
How To Add An AI Chatbot To Your Website
Pasting the script is the quick part. What decides whether the assistant helps happens before that, and in the week after. Here is the whole job, step by step.

You've decided to try a chatbot. There's no developer to hand it to. And every guide that promises to explain how to add an AI chatbot to your website turns out to be the same four lines: paste your URL into our tool, pick a color, copy the code, done.
We build one of those tools, so we know why the guides read that way. The steps aren't wrong, just the easy half. The embed is one pasted line. What decides whether the bot helps is what you let it read, what it does when it's stuck, and whether anyone looks at it after launch week.
So yes, this walkthrough uses our own product, Flidu, start to finish. In return you get each step under the name the dashboard gives it, and a plain account of where the product stops.
Before You Add Anything, Give The Assistant One Job
A chatbot with no particular job answers everything badly. Write one sentence saying what yours is for, narrow enough that in a month you could tell whether it worked.
Say you run a two-van plumbing firm. "Answer customer questions" is not a job. "Tell people whether we cover their area, what a call-out costs and how soon we can come" is one, and it already tells you which pages the assistant needs and which questions to test it with.
Then settle the awkward half: what happens when it can't answer. Someone will ask about a boiler leaking at 11pm, and the assistant shouldn't guess. Nobody on a small team watches a chat window all day, so don't promise a chat. Decide where that person goes instead (your WhatsApp, say). Step 1 builds exactly that. The wording around that hand-off has its own post: chatbot fallback message examples.
If the job sentence was hard to write, take the hint. Some small businesses don't need a bot yet; a Contact-only widget (step 1 alone) is the honest start.
How To Add An AI Chatbot To Your Website With Flidu
Flidu is one widget with two sides. Ask AI is the assistant, which answers from pages you approve. Contact holds the ways to reach you, such as a WhatsApp button. They're two separate product lines, AI Chatbot and Website Widgets, each with a Free plan that needs no card and has no time limit, so this whole guide can be done without paying us. The pricing page lists the limits; we flag the ones you'll hit.
The build is six steps (the Setup Guide covers the same ground):
- Build the widget and its Contact tab.
- Create the assistant and choose what it reads.
- Write its first words and connect it.
- Review what it indexed.
- Ask it hard questions before any visitor can.
- Publish, then paste one script.
Step 1: Build The Widget And Its Contact Tab
This order looks backwards on purpose. The assistant needs a widget to live in, and the people it can't help need somewhere to go, so build both first.
In the dashboard, open Website Widgets and start a new widget. Website Widgets Free covers one website, so if you already have a site there, open it and go to its Channels tab. The first screen, Website Details, asks for a name, your domain in bare form (example.com) and a notification email. Under Starting Setup pick Start from scratch, then in Channels tick the route you settled on. WhatsApp, Telegram, Messenger and Instagram are all on Website Widgets Free. A Contact Form isn't; it starts on Website Widgets Starter.
Appearance sets an accent color and a corner: bottom right or bottom left, nothing in between. If a sticky bar or cookie button already lives in that corner on a phone, read stop your chat widget covering content on mobile before you choose.
Channels ticked in that flow arrive as unpublished drafts. Once the widget exists, open its Channels tab, click Add Channel and pick WhatsApp. Enter your Phone number with its country code and an Agent name, then Save as Draft and Publish changes. What you've built is a hand-off: the button opens WhatsApp with you on the other end, and the conversation happens there, not inside Flidu.
Step 2: Create The Assistant And Choose What It Reads
Now open AI Chatbots and choose Create AI Chatbot. It's a five-screen flow: Basics (a Chatbot Name, plus the Tagline and Greeting Message a visitor reads first), Data Sources, Behavior, Fallback, then Preview & Connect.
Website URL, Sitemap Or Manual URL List
Ask AI is built to answer from the sources you add, not from the open internet. Choose Add Source. For web pages there are three kinds:
- Website URL reads one address and, with the Follow links on this site switch on, same-site pages it links to, one level deep.
- Sitemap takes your XML sitemap and reads pages listed in it.
- Manual URL List takes up to 25 addresses on one website and reads exactly those.
On AI Chatbot Free an assistant gets one of these and 50 indexed pages, so you're choosing, not stacking. For the plumbing firm that's services, pricing, coverage area, opening hours and the FAQ: perhaps a dozen addresses, which makes Manual URL List the honest choice. The other two index a limited batch of pages per crawl, and can pick up the blog archive or last spring's expired offer while missing the pricing page. A small, accurate set beats a large, stale one, because the assistant can't know which of two conflicting pages is current.
Facts that live on no page can go in an uploaded file (TXT, Markdown, CSV or HTML; one file on Free). Manual Q&A, where you add your own question-and-answer pairs as a source, starts on AI Chatbot Starter.
Thin or contradictory pages are their own job, covered in how to prepare website content for an AI chatbot.
Save the source, but leave its Start indexing button alone for now. Once indexing begins, the Basics, Behavior and Fallback screens turn read-only inside this flow. (The same settings stay editable on the assistant's Suggested Questions and Settings tabs.)
Step 3: Write Its First Words And Connect It
The Behavior screen holds the Suggested Questions, the prompts a visitor can tap on opening Ask AI. AI Chatbot Free shows up to three. Pick ones your pages answer well: a suggested question the assistant can't answer is a bad first impression you wrote yourself. Reread the Greeting Message from Basics too. It should say this is an AI assistant and what it knows about.
Fallback has almost nothing to set: there is no fallback message to write. When your sources don't cover a question, Ask AI is built to say so in its own words. What you control is where a visitor can go next, and that depends on where the assistant is installed. One warning for both screens: Continue doesn't save. If you changed a field, press Save changes first.
Now go back to Data Sources and choose Start indexing, then move on to Preview & Connect, which asks where to install. You want Add to an existing Website Widget and the widget from step 1, so Contact and Ask AI share one widget and a stuck visitor can switch to the Contact tab. The option selected when the screen opens, Install as Ask AI-only, uses no Website Widgets slot but has no Contact tab.
If the widget option is still closed, indexing hasn't finished or the widget isn't published. Choose Save as draft and connect in step 6 (Create AI Chatbot can publish the Ask AI-only version instead). Once connected, Ask AI joins the widget as a draft and stays private until you publish it.
Step 4: Review Indexed Content Before Anyone Sees It
Open the assistant from the AI Chatbots list and go to its Data Sources tab. Under your sources is a list called Indexed Content. Every line should be a page you chose on purpose.
Two tools tidy it. Each page has an Ignore action, which stops that page being used in answers. For whole sections, Included & Ignored Pages takes patterns such as "Path starts with" /blog, and matching pages are skipped on the next crawl. AI Chatbot Free allows two patterns.
Check the Failed filter as well, and that no page you need is missing. A pricing page that wasn't read is a pricing question the assistant can't answer.
Step 5: Ask It Hard Questions In Preview
The Preview tab is a test chat only you can see. Start with a question you already know the answer to and look under the reply for Sources: up to three pages Ask AI looked at for that question, where sources are available. You'll want that list on the day the assistant says something wrong, because it tells you which pages to open first. Our post on a chatbot giving wrong answers walks through the tracing.
Then ask things your site doesn't cover. Do you sell gift vouchers? Can I pay in installments? You're checking that it says it doesn't have the answer and doesn't improvise. The reply is written by the AI, so its wording varies. Three or four of these show how yours behaves.
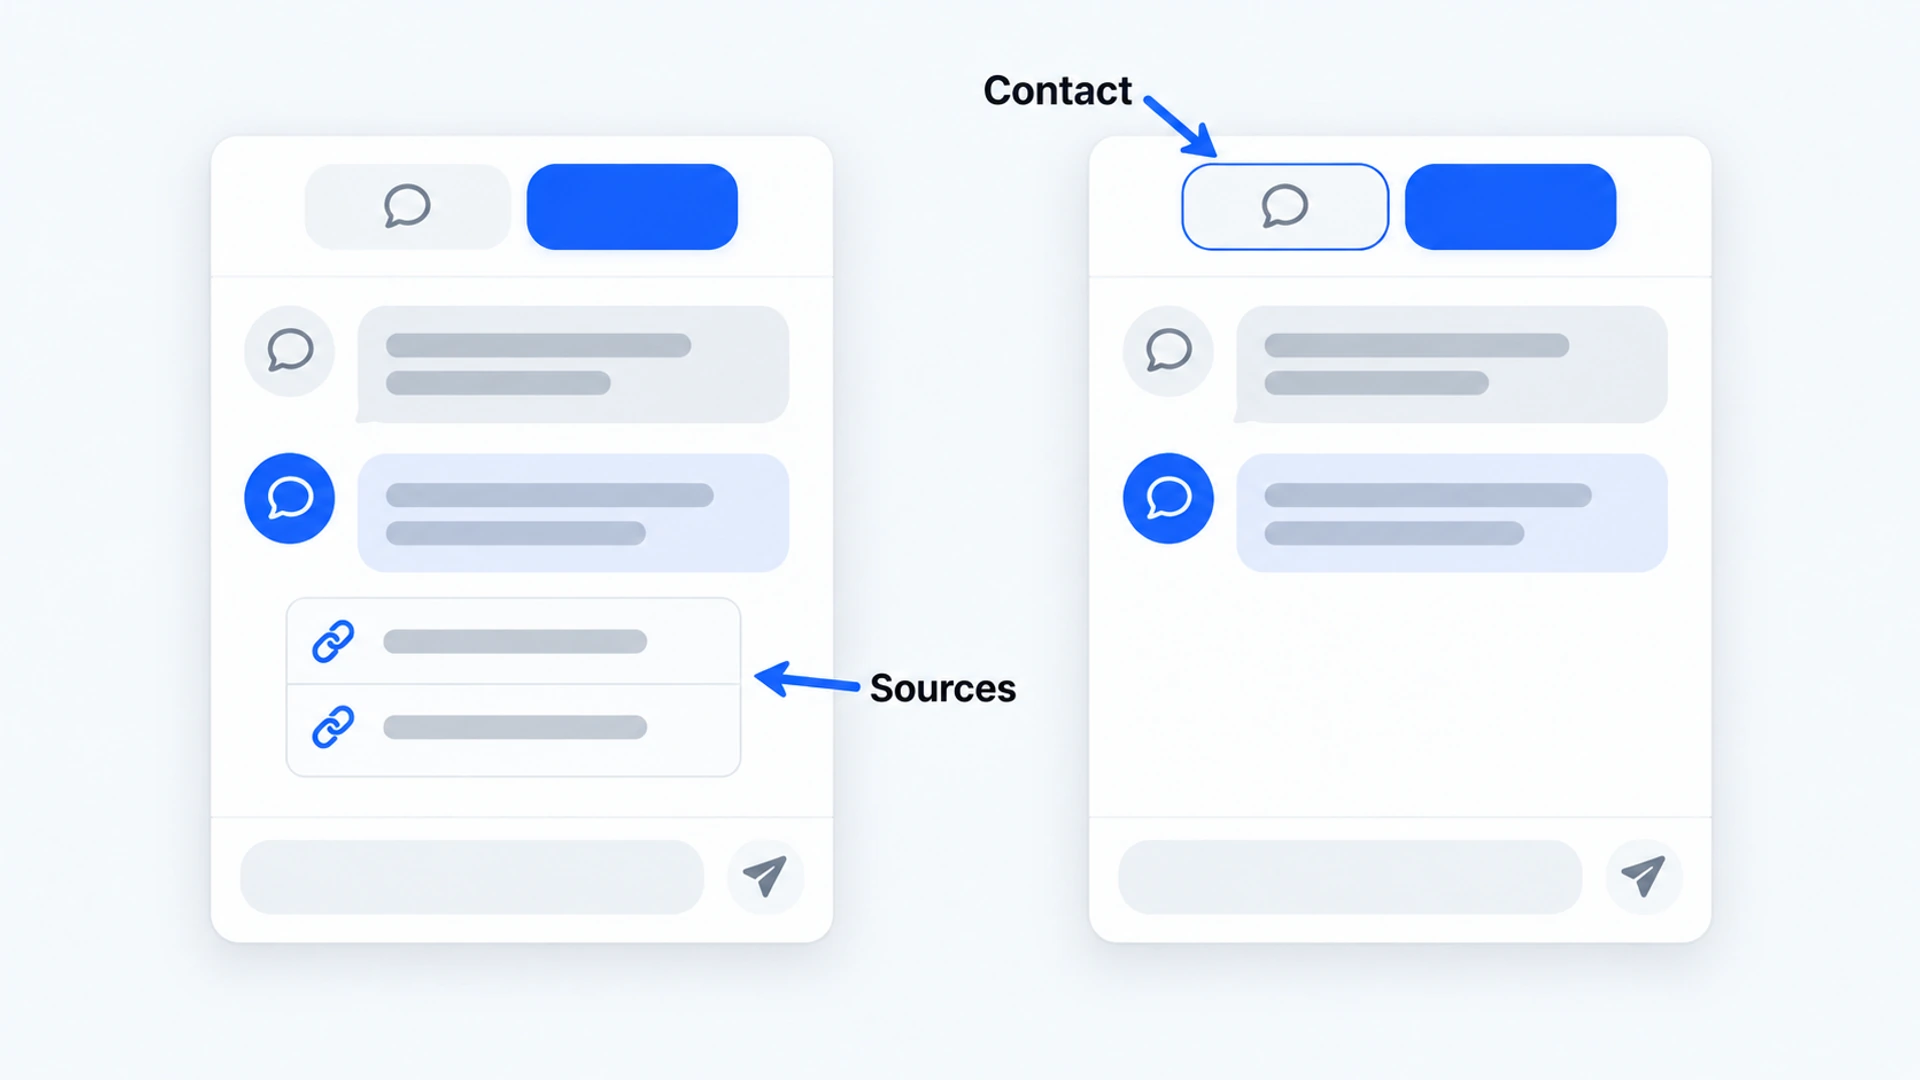
Watch the counter under the test chat. Your own questions come out of the month's AI messages, and AI Chatbot Free has 100. For a full set of 30 awkward ones, see test a chatbot before launch.
Step 6: Publish, Then Paste One Script
When the answers hold up, scroll to the Connection section on the Preview tab. If you saved a draft in step 3, choose Connect to Widget and pick your widget first. Then choose Publish Ask AI. Now open the widget from step 1 and go to its Install tab, which shows one snippet with your widget's key already filled in:
<script defer src="https://flidu.com/widget.js" data-widget="YOUR_WIDGET_KEY"></script>Copy yours from the dashboard, never from a blog post. It goes once on every page, just before the closing </body> tag. One snippet carries both tabs and never changes; later edits go live from the dashboard with no reinstall.
How To Add An AI Chatbot To Your Website Without A Developer
Flidu has no WordPress plugin and no Shopify app. The install is the same pasted script everywhere, and on most site builders you never touch that tag: there's a box for footer code. Here's where it goes on four builders our install guide names, going by their own help pages in October 2026. Menus move, so trust the linked instructions over this table.
| Site Builder | Where The Script Goes | Check First |
|---|---|---|
| WordPress | With a code-snippet plugin. The WordPress.com guide (opens in a new tab) uses the free one from WPCode: Code Snippets, Header & Footer, Footer box. | On WordPress.com this needs a paid plan. |
| Squarespace | The Code Injection (opens in a new tab) panel, Footer field. | Included with Core, Plus and Advanced plans and some older ones. |
| Shopify | Online Store, the menu beside your theme, Edit code (opens in a new tab), then theme.liquid. Paste just above </body>. | Duplicate the theme first. Shopify says to edit code only when an app or the theme editor can't do the job. |
| Webflow | Site settings, Custom code tab, Footer code. | Needs a paid Workspace or an active Site plan. Publish the site to see it. |
The check: open a private window and load your home page and your booking or enquiry page, on desktop and phone. Ask the assistant one question. Back in the dashboard, the Install tab's Verify Installation button reports whether the widget was detected. Checkout is the exception: Shopify and Squarespace don't run this kind of code there, so a missing launcher is normal. For anything else, work through the widget-not-showing checklist.
After It Is Live, Read The First Week
Those six steps are how to add an AI chatbot to your website. Keeping it worth having takes one more appointment: twenty minutes on day seven. Skip it, and that's how an assistant ends up quoting last year's prices for six months.
Open the assistant's Analytics tab. AI Chatbot Free shows counters only: AI messages and chat sessions for the month. The lists of what people asked, Top Questions and Unanswered Questions, start on AI Chatbot Starter. On Free you'll know whether the assistant is being used. You won't know what for.
With the lists in front of you, sort what went badly into two piles:
- Wrong answers. The assistant repeats what you published, so check the page behind each one first. Fix the page, then choose Recrawl on its source. Recrawls run on request and each plan allows a set number a month (the assistant's Usage tab keeps count), so fix every page you can before spending one.
- No answer. Each of these is a visitor telling you what your site is missing.
That second pile is the one we'd read first. There's a monthly routine for it in what to do with unanswered chatbot questions.
A count close to zero deserves a look too: reread the job sentence. An assistant nobody has needed after a fair month hasn't earned its corner of the screen. You can pause Ask AI from the dashboard and leave the Contact tab running, which may be all your visitors wanted.